Ah, the long awaited sequel to my post on boosting the output of your garden year after year for $25! Â I bet you didn’t think I’d pull it off! Â I almost didn’t thanks to mother nature and some emergency roof repair.
After about 2 weeks of bad weather and interuptions, I finally got a free day and some good weather to build a low impact compost heap from recycled materials. Â Let’s get started!
Tools:
- Chainsaw
- Tractor with front end loader
- Post pounder
- Tape Measure
- Marking paint
- D handle fork
- Safety Glasses
- Hearing protection
- Gloves
The tractor and chainsaw aren’t absolutely necessary, but MAN did they make things easier!
Materials:
- (12) 4 foot long rebar
- Green saplings/trees
- Compost materials
If you plan on constructing your bin in an open area, you might not have trees to construct the sides of the bin. Â A good source of free scrap wood is shipping pallets. Â You’ll have to come up with a different method to construct the bin, but you can do it!
Time:
- 4 hours planning
- 16 hours building
- 30-60 minutes every 2 weeks turning compost over
Procedure:
- Scout out a potential location for your compost heap. Â Somewhere near your garden is ideal. Â I prefer to use an area shaded by trees to prevent the compost from drying out.
- Use the tape measure to determine the overall size of the area you have scouted. Â Mark all of the trees in this area with marking paint so you know which trees to cut down. Â I plan on making the sides of the heap 15×15 feet, so I cleared an area 20×20 feet. Â It is a good idea to have a clear area outside of the heap so you can add materials and turn the compost without having to walk in it.
- Using your chainsaw and adequate personal protection equipment (PPE), clear the marked trees and underbrush from the area. Â Be sure to cut the stumps flush with the ground to avoid damaging equipment or hurting yourself. Â Use a tractor and chains to skid any logs that are too heavy to carry if necessary. Â Set aside any straight saplings that are at least 1 inch in diameter. Â We will use these to construct the sides of the bin.
- Mark the ground where you want to construct the bin using the tape measure and orange paint. Â Using green paint, mark the corners and mid points where you will drive the rebar into the ground.
- Lay out the largest trees on the ground over the orange marks for the sides of the bins. Â You will use the green marks and the width of these trees to determine the placement of the rebar.
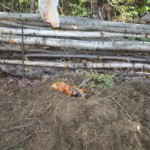
- Use the post pounder to drive the 4 foot rebar 2 feet into the ground. Â 2 feet is about as tall as you want the bin. Â You should be able to step over the sides and work over the sides with the fork to turn the compost.
- Hit the tops of the rebar with some orange marking paint so they are easy to see. Â Catching one of these in the knee/shin is enough to make you remember this pointer!
- Continue placing trees and saplings into the cradles made by the rebar, the first series of trees, and the ground. Â Make sure to alternate sides so that the trees overlap and interlock at the corners. Â Keep adding trees until you have 2 foot walls.
- Using your chainsaw and PPE, trim any trees at about 1 foot past the end of the rebar. Â Make sure to leave enough of the tree so that it overlaps and interlocks with trees on the other sides of the bin.
- Make sure the inside of the bin is free of any inorganic materials or anything too large to compost such as stumps.
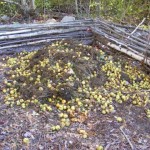
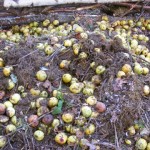
- Start adding your compost material. Â I used some of the brush I cleared when I started building my pump track as brown material. Â This was most easily moved with a tractor and front end loader due to the volume of material. Â I used some kitchen waste and crab apples that were knocked down in a wind storm as green material.
- Use the D handle fork to turn and mix the compost heap. Â Make it into a pile with a uniform distribution of material. Â Make a small divot in the top of the pile to catch rain water. Â Have a tarp ready to put on the pile in case there is too much rain in the forecast.
If you have any questions about what to put in the heap, how much moisture there should be, or whatever else you need to do to make compost, check out my instructional article on composting from a few weeks ago. Â Be sure to check out the gallery for step by step pictures of this project!
See you next time!


